Use VeonikBlogBundle as a WordPress replacement
Wordpress is the defacto standard when it comes to web blogging. However, it is poorly architected and can be quite the mess, not to mention security issues abound. If you're not afraid to get your hands a little dirty, you could be using the basis of Tyler Sommer dot com, VeonikBlogBundle, as your blogging platform instead.
VeonikBlogBundle supports a wide variety of code highlighting languages using syntaxhighlighterjs. It also uses CKEditor on the administration side for rich content editing, attachments, and image uploads. Posts and pages are rendered using a full Twig environment, so you have complete control in what is rendered on your page.
Why should I use VeonikBlogBundle?
Tyler Sommer dot com is built with Symfony 2, leveraging several open-source components to create a complete application stack. VeonikBlogBundle provides the blogging and page editing functionality. It also relies on OrkestraApplicationBundle for providing basic user and group administration as well as authentication.
VeonikBlogBundle is built using Bootstrap 2.3.2 and FontAwesome 3.2.1. This means that your blog will, by default, be responsive and mobile-friendly.
Upgrading to Bootstrap 3 is fairly straightforward and will be covered in a future blog post.
We will walk through setting up your own blogging application. This guide assumes you've got Composer installed on your system.
Installation
First of all, set up a brand new Symfony 2 Standard Edition installation by running
composer create-project symfony/framework-standard-edition path/
Once the framework is installed, you'll be walked through the creation of parameters.yml. After this initial process is complete, open the project in your editor and edit app/config/parameters.yml and app/config/parameters.yml.dist. Add tracking_id, but you can leave it blank for now:
parameters:
    # ...
    tracking_id: ~
The tracking_id should be your Google Analytics tracking ID. If you choose to include this, Google Analytics javascripts will be included in each page.
Next, we need to install the various bundles necessary for the application to function. These bundles include:
- VeonikBlogBundle, as mentioned, provides blogging functionality.
- OrkestraApplicationBundle provides user management among other things. It relies on Doctrine ORM and Orkestra Common, as well as JMSSecurityExtraBundle.
- TrsteelCkeditorBundle provides CKEditor integration with the application.
- DoctrineFixturesBundle provides data fixtures for simple initial loading of data into your database. This bundle is only necessary in the dev environment, but we'll deal with that shortly.
Run composer require to install the necessary components:
composer require veonik/blog-bundle:1.0.x-dev orkestra/application-bundle:1.0.x-dev trsteel/ckeditor-bundle:1.6.x-dev doctrine/doctrine-fixtures-bundle:2.2.x-dev
Configuration
With the dependencies installed, open up and modify app/AppKernel.php, adding all the new bundles:
<?php

class AppKernel extends Kernel
{
    public function registerBundles()
    {
        $bundles = array(
            // ...
            new JMS\AopBundle\JMSAopBundle(),
            new JMS\DiExtraBundle\JMSDiExtraBundle($this),
            new JMS\SecurityExtraBundle\JMSSecurityExtraBundle(),
            new Trsteel\CkeditorBundle\TrsteelCkeditorBundle(),
            new Orkestra\Bundle\ApplicationBundle\OrkestraApplicationBundle(),
            new Veonik\Bundle\BlogBundle\VeonikBlogBundle(),
        );

        if (in_array($this->getEnvironment(), array('dev', 'test'))) {
            $bundles[] = new Doctrine\Bundle\FixturesBundle\DoctrineFixturesBundle();
            $bundles[] = new Symfony\Bundle\DebugBundle\DebugBundle();
            $bundles[] = new Symfony\Bundle\WebProfilerBundle\WebProfilerBundle();
            $bundles[] = new Sensio\Bundle\DistributionBundle\SensioDistributionBundle();
            $bundles[] = new Sensio\Bundle\GeneratorBundle\SensioGeneratorBundle();
        }

        return $bundles;
    }

    // ...
}
You can see, we check the application environment before registering DoctrineFixturesBundle. This ensures the bundle is only loaded in the development environments and not production.
Next, we need to modify Assetic and Doctrine ORM configurations in the main configuration file. Open app/config/config.yml and modify as follows:
# Assetic Configuration
assetic:
  # ...
  bundles:        [ 'VeonikBlogBundle' ]

# ...

# Doctrine Configuration
doctrine:
  dbal:
    # ...

  orm:
    auto_generate_proxy_classes: %kernel.debug%
    entity_managers:
      default:
        mappings:
          OrkestraCommon:
            type: annotation
            dir: %kernel.root_dir%/../vendor/orkestra/common/lib/Orkestra/Common/Entity
            prefix: Orkestra\Common\Entity
            is_bundle: false
          OrkestraApplicationBundle: ~
          VeonikBlogBundle: ~
    resolve_target_entities:
      Orkestra\Bundle\ApplicationBundle\Model\UserInterface: Orkestra\Bundle\ApplicationBundle\Entity\User
      Orkestra\Bundle\ApplicationBundle\Model\GroupInterface: Orkestra\Bundle\ApplicationBundle\Entity\Group
      Orkestra\Bundle\ApplicationBundle\Model\PreferencesInterface: Orkestra\Bundle\ApplicationBundle\Entity\Preferences
      Orkestra\Bundle\ApplicationBundle\Model\Contact\AddressInterface: Orkestra\Bundle\ApplicationBundle\Entity\Contact\Address
      Orkestra\Bundle\ApplicationBundle\Model\Contact\RegionInterface: Orkestra\Bundle\ApplicationBundle\Entity\Contact\Region
      Orkestra\Bundle\ApplicationBundle\Model\Contact\CountryInterface: Orkestra\Bundle\ApplicationBundle\Entity\Contact\Country
Because we are using Orkestra Common, we need to manually specify mapping sources for Doctrine. Additionally, OrkestraApplicationBundle makes use of interfaces in its mapping to allow custom implementations of the given entities. We'll use the default implementations for now.
Now, we must tell Symfony how to authenticate users and protect the administrative areas. Replace the contents of app/config/security.yml with:
jms_security_extra:
  secure_all_services: false
  expressions: true

security:
  role_hierarchy:
    ROLE_USER_WRITE:  ROLE_USER_READ
    ROLE_GROUP_WRITE: ROLE_GROUP_READ

    ROLE_COMMENT_WRITE: ~

    ROLE_USER:        [ ROLE_COMMENT_WRITE ]
    ROLE_ADMIN:       [ ROLE_USER, ROLE_USER_WRITE, ROLE_GROUP_WRITE ]
    ROLE_SUPER_ADMIN: [ ROLE_ADMIN, ROLE_ALLOWED_TO_SWITCH ]

  encoders:
    Orkestra\Bundle\ApplicationBundle\Entity\User: sha512

  providers:
    entity:
      entity: { class: Orkestra\Bundle\ApplicationBundle\Entity\User }

  firewalls:
    dev_and_assets:
        pattern:  ^/(_(profiler|wdt)|css|images|js)/
        security: false

    user_area:
      anonymous: true
      logout: ~
      form_login:
        login_path: /connect
        check_path: /login/check
        username_parameter: "form[username]"
        password_parameter: "form[password]"

  access_control:
    - { path: ^/manage, role: ROLE_ADMIN }
Symfony2 security configuration can be quite verbose. See the corresponding documentation for more information on customizing security.
Then, edit app/config/routing.yml adding all routes:
# Authentication routes
login:
  pattern: /connect
  defaults: { _controller: OrkestraApplicationBundle:Auth:login }

login_check:
  pattern: /login/check

logout:
  pattern: /logout

# Bundle routes
BlogBundle_routes:
  resource: "@VeonikBlogBundle/Resources/config/routing.yml"

OrkestraBundle_routes:
  resource: "@OrkestraApplicationBundle/Controller"
  type:     annotation
  prefix:   /manage
Getting up and running
Now that configuration is complete, we need to create the database schema and load initial data. Run the following commands from your terminal:
app/console doctrine:database:create
app/console doctrine:schema:create
app/console doctrine:fixtures:load
Next, replace the contents of app/Resources/views/base.html.twig with:
<!DOCTYPE html>
<html>
    <head>
        <meta charset="UTF-8" />
        <meta name="viewport" content="width=device-width, initial-scale=1, maximum-scale=1">
        <title>{% block title %}{% if title is defined %}{{ title }} - {% endif %}My Blog App{% endblock %}</title>
        <link href="//fonts.googleapis.com/css?family=Open+Sans:400,300|Lobster+Two:400,700|Inconsolata:400,700" rel="stylesheet" type="text/css">
        <link href="//netdna.bootstrapcdn.com/font-awesome/3.2.1/css/font-awesome.min.css" rel="stylesheet">
        {% block stylesheets %}
            {% stylesheets filter='cssrewrite, ?yui_css' output="css/application.css"
                'bundles/veonikblog/css/bootstrap.css'
                'bundles/veonikblog/css/bootstrap-responsive.css'
                'bundles/veonikblog/css/select2.css'
                'bundles/veonikblog/css/bootstrap-datepicker.css'
                'bundles/veonikblog/css/application.css'
            %}
        <link rel="stylesheet" href="{{ asset_url }}" />
            {% endstylesheets %}
        {% endblock %}
        <link rel="icon" type="image/x-icon" href="{{ asset('favicon.ico') }}" />
    </head>
    <body>
        {% block body %}
        <div class="navbar navbar-static-top">
            <div class="navbar-inner">
                <div class="container">
                    <a class="brand" href="{{ path('home') }}">My Blog App</a>
                    <a class="small-brand" href="{{ path('home') }}">ba</a>
                    {{ render_menu('main_nav') }}
                </div>
            </div>
        </div>
        <div id="main" class="container container-fluid">
            {% block container %}
            <div class="row-fluid">
            <div class="span9 content-box">
                {% if app.session.flashBag.has('success') %}
                    <div class="alert alert-success">
                        {{ app.session.flashBag.get('success')[0] }}
                    </div>
                {% endif %}
                {% if app.session.flashBag.has('alert') %}
                    <div class="alert">
                        {{ app.session.flashBag.get('alert')[0] }}
                    </div>
                {% endif %}
                {% if app.session.flashBag.has('error') %}
                    <div class="alert alert-error">
                        {{ app.session.flashBag.get('error')[0] }}
                    </div>
                {% endif %}
                {% block content %}
                {% endblock %}
            </div>
            <div class="span3">
                {% block right_side %}
                {{ render(controller('VeonikBlogBundle:Home:rightSide')) }}
                {% endblock %}
            </div>
            </div>
            {% endblock %}
        </div>
        {% endblock %}
        {% block main_javascripts %}
        <script src="//ajax.googleapis.com/ajax/libs/jquery/1.10.1/jquery.min.js"></script>
        <script src="//netdna.bootstrapcdn.com/twitter-bootstrap/2.3.2/js/bootstrap.min.js"></script>
            {% javascripts filter='?yui_js' output="js/application.js"
                'bundles/veonikblog/js/*.js'
            %}
        <script type="text/javascript" src="{{ asset_url }}"></script>
            {% endjavascripts %}
        {% endblock %}
        {% block additional_javascripts %}{% endblock %}
        {% block analytics_javascripts %}
        {{ ga_tracking() }}
        {% endblock %}
    </body>
</html>
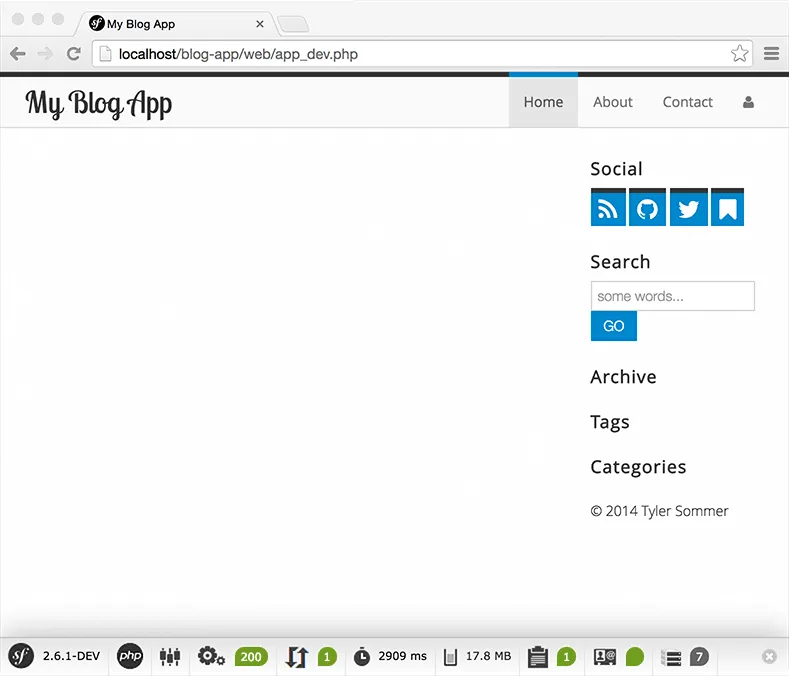
Voila!
Visiting the website will display a blank home page, ready for your blog-writing prowess to grace the web. You can login with the username admin and the password password.
You'll notice the login page looks a bit funny, and after logging in, the Users or Groups pages will also render oddly. Download these views and place them in your app/Resources folder to remedy this. See this section of the Symfony documentation for more information on overriding bundle templates.
What's next?
Next time, we'll customize the look and feel of our blog by upgrading to a free Bootswatch theme. In the meantime, check out the Tyler Sommer dot com source code to get an idea of how to customize error pages or implement OAuth authentication.